Dear Operators,
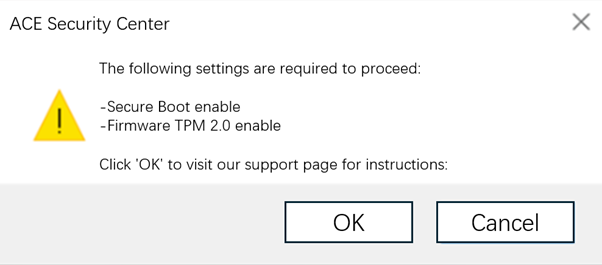
Recently, some players have reported seeing an in-game pop-up requiring them to enable "Secure Boot" and "TPM" (as shown in the image below). These are security features for Windows 10 and Windows 11 that ensure your PC only loads trusted software during startup. Enabling these features won't violate your privacy or affect how you use your computer.
Secure Boot allows the game to detect and remove malicious content, reducing cheating and better protecting your gaming experience and account security.
STEP ONE: Check if DISK is GPT
a. Hold the "Windows" key + "X" at the same time, then select "Disk Management" from the pop-up menu. Once selected, the "Disk Management" page will appear. Locate the disk where your "System Drive" is located. (In this image, it's "Disk 1" where the C drive is located.)
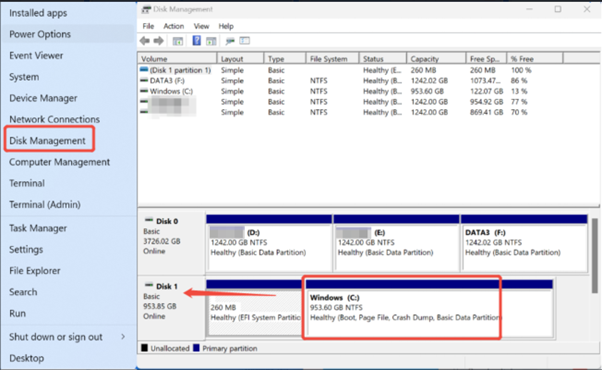
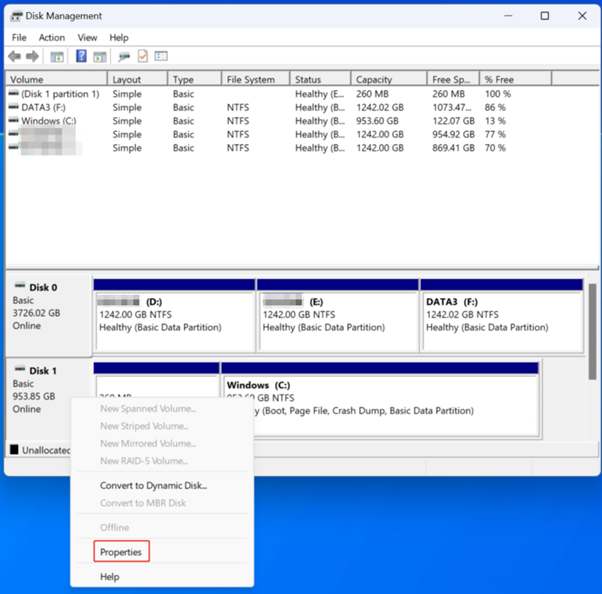
b. Remember your disk number (in this case, Disk 1). Right-click on the corresponding disk, select "Properties," and in the pop-up window that appears, click on "Volumes" and check the "Partition Style".
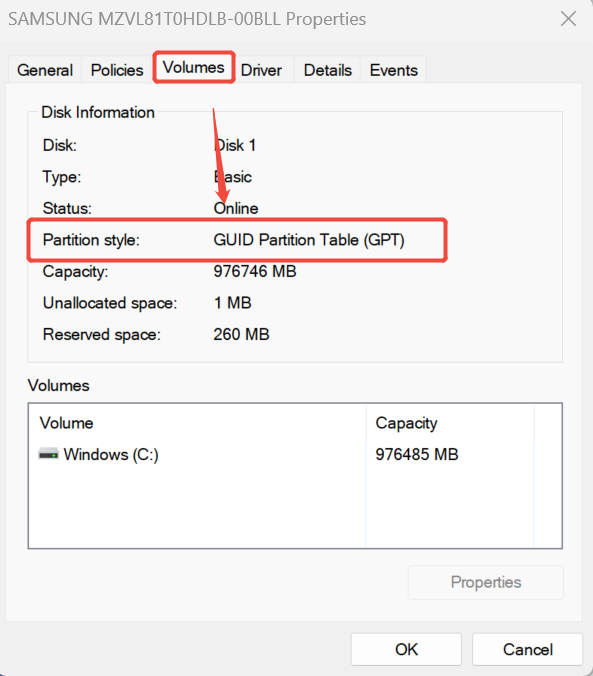
If your device's partition style is "GPT," you can skip STEP 2 and jump straight to STEP 3 for the remaining setup.
If your device's partition style is not "GPT" (such as "MBR"), you'll need to convert your hard drive to GPT mode first before continuing. Please refer to STEP 2.
STEP TWO: Convert DISK mode to GPT
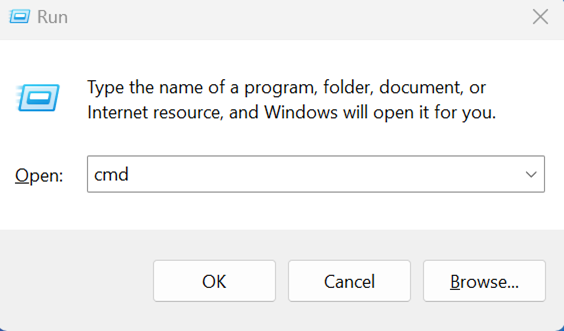
a. Hold the "Windows" key + "R" at the same time. When the "Run" window appears, type "cmd" and press OK or Enter.
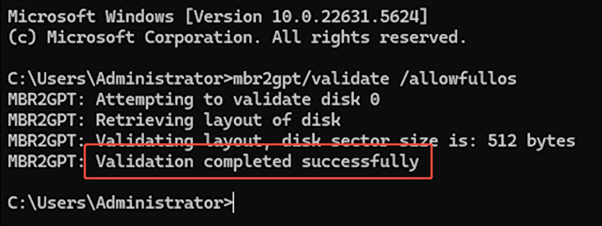
b. In the pop-up window, copy and paste the content within quotes: "mbr2gpt /validate /allowfullos" and press Enter. If you get a "successful" message, you can continue to the next step. If it fails, please try again.
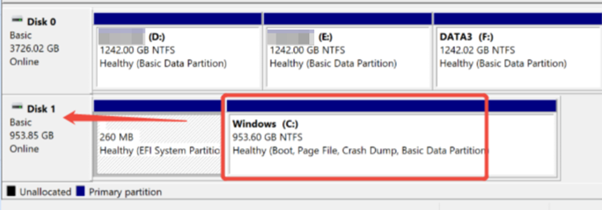
c. If you only have one disk, skip this step. If you have multiple disks, determine which disk number contains your system drive from the previous step. Using the image below as an example, the C drive is on Disk 1. Remember this disk number as you'll need it in the next step.
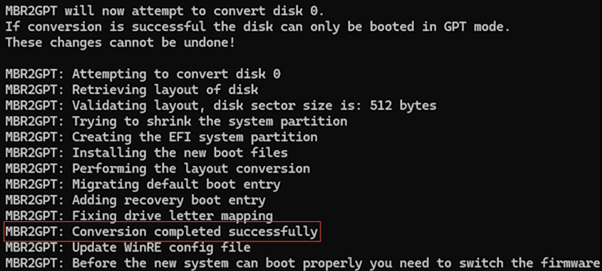
d. In the window from Step Two, continue by copying and pasting the content within quotes: "mbr2gpt /convert /disk:0 /allowfullos". If you have multiple disks, you'll need to adjust the number in "disk:0" based on the disk number where your system drive is located from the previous step. In the previous step's example, the C drive was on Disk 1, so the actual command to enter would be "mbr2gpt /convert /disk:1 /allowfullos".
After confirming the steps above are complete and entered correctly, press Enter. If it fails, please try again.
STEP THREE: Check your "BIOS Mode"
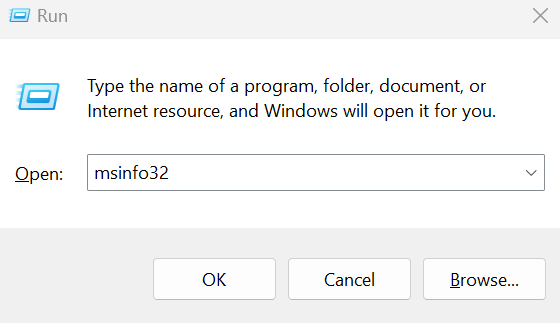
a. Hold the "Windows" key + "R" at the same time. When the "Run" window appears, type "msinfo32" and press OK or Enter.
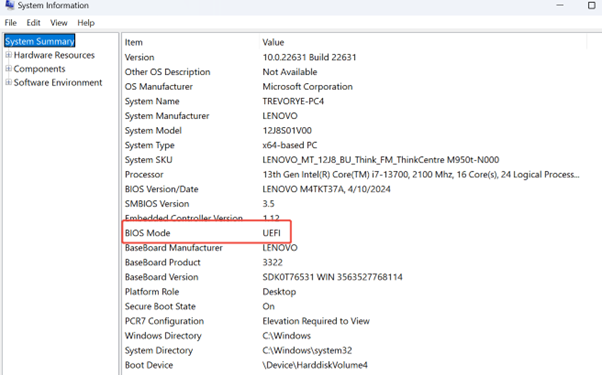
b. After completing the previous step, the "System Information" page will appear. Check whether your "BIOS Mode" is "UEFI."
If your BIOS Mode is UEFI, continue with the settings in STEP 4.
If your BIOS Mode is non-UEFI (such as "Legacy"), you'll need to switch it to "UEFI" mode first. You can contact your motherboard manufacturer for further support.
STEP FOUR: Enter BIOS to make modifications
Before entering the BIOS page to make modifications, please confirm you've completed the verification in the first three STEPs to ensure this BIOS modification will achieve the expected results.
If you're not sure how to access your BIOS page, here are BIOS access instructions for some motherboard brands:
Restart your computer, and when you see prompts on the boot screen, quickly press or hold the "access key." The key varies by motherboard brand:
ASUS: Usually F2 or DEL.
Gigabyte: Usually F12 or DEL.
MSI: Usually DEL.
HP: Laptops typically use F2 or F10; desktops may use F12 or ESC.
Dell: Usually F2, some models use F12.
Lenovo: Usually F2 or Fn+F2, some ThinkPad models use F1.
Acer: Usually F2.
Sony: Usually F2, some newer models use ASSIST.
Toshiba: F1 or F2 during Cold Boot.
IBM/ThinkPad: F1 during Cold Boot, some newer models allow F1 during restart.
If you are still not able to enter BIOS setup, please contact your motherboard manufacturer and check on its specifications for BIOS entry.
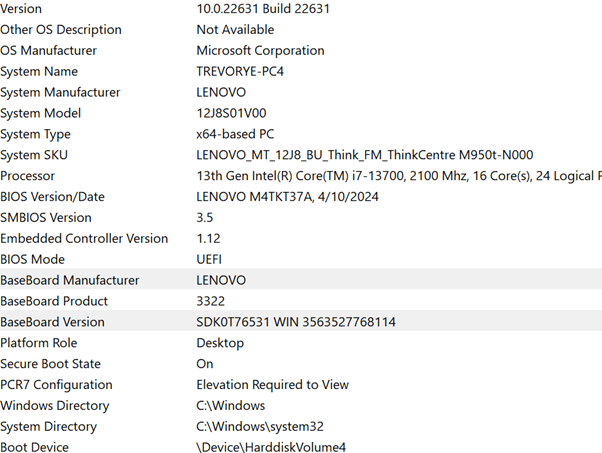
Follow the steps below to find the motherboard brand if you are not sure:
① Press Windows key + R
② Type msinfo32 and hit Enter
This will show you your motherboard brand (as shown in the image below).
After entering the BIOS page, you'll need to perform the following operations:
a. Secure Boot: Select "Enable." Some models require you to also select "Active" after enabling.
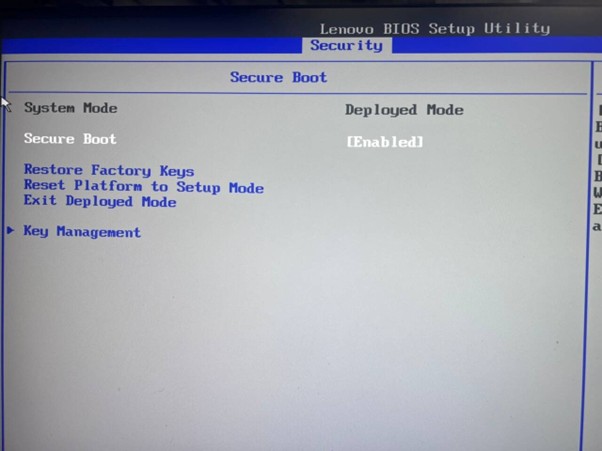
b. TPM: Select "Enable." If your device allows you to select a TPM version, choose "2.0."
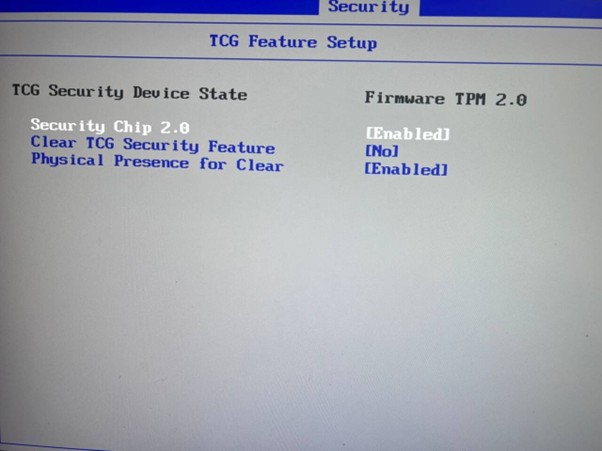
As shown in the image, these two options are typically found under the "Advanced"/"Security"/"Boot" menus, but depending on your motherboard manufacturer's settings, the names and locations of these switches may vary.
If you can't find the relevant switches on your BIOS page, you can search for related tutorials using "motherboard brand + Secure boot/TPM" or contact your motherboard manufacturer for further support.
Windows 11 and Secure Boot - Microsoft Support
Enable TPM 2.0 on your PC - Microsoft Support


