Hello Operator, if you're new around here, check this guide out! It's meant for absolute beginners, covering the basics about Operations Mode, how to play, what to do and more!
Several videos and other resources are provided courtesy of Delta Force creators, please feel free to check them out!
Contents Page (Blue Sections can be clicked to redirect you):
Introduction
Section 1: So you want to play Operations
1.1. Basics - Layout and Currency
Section 2: Getting Ready
2.1. Loadout - Preparing for battle
2.2. Gunsmith - Your gun, your way
2.3. Gear Tickets - When you're not sure what to bring
Section 3: Combat
3.1. Injuries and Medical Items
Section 4: Zero Dam
Section 5:
What is Operations Mode?
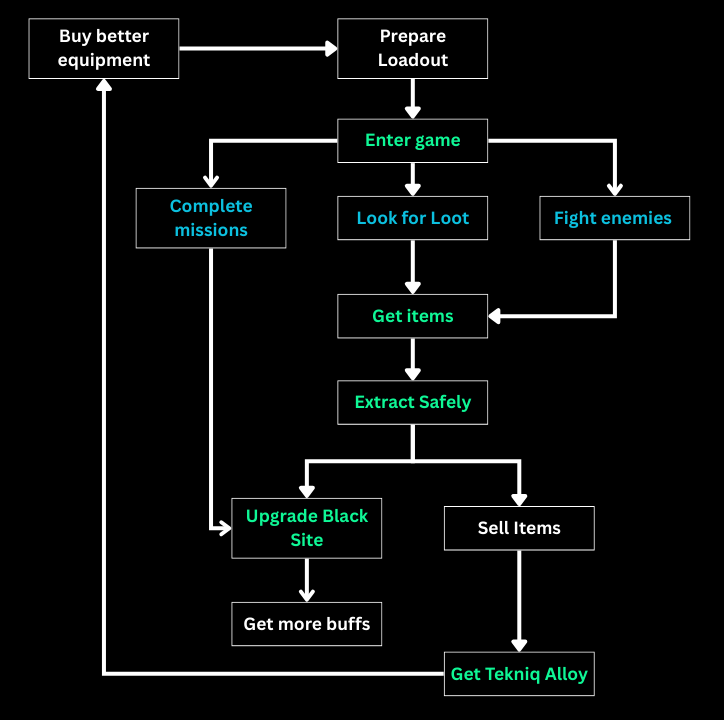
Conventionally, the mode is known as an Extraction Mode - you enter the map, loot items, and then extract from the map to keep your items. Dying in the map means losing all your items, except when the items have been placed inside a small safe box.
In essence, the aim of the game is to collect expensive items, get rich and stay strong!
Even if this diagram below does not make sense to you now, it should after reading this guide.
Section 1: So you want to play Operations
1.1. Starting off with the Basics
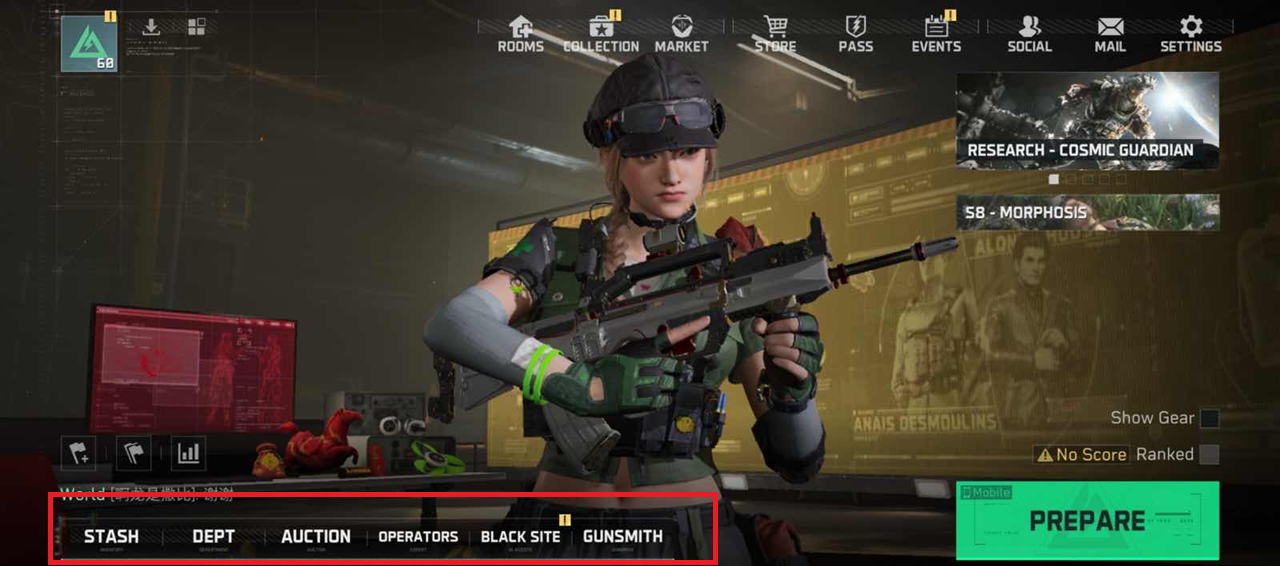
As a new player, there are a few basics of Operations Mode to understand and those are:
- Stash
- Departments
- Black Site
- Gunsmith
Tekniq Alloy:
Tekniq Alloy is the main currency of the game, which is what you obtain by selling items that you get from looting in the map or enemies that you have defeated. The aim of the mode, is to get rich, stay rich and enjoy your fights!
1.2. Stash
Starting off with Stash - this is basically your storage box
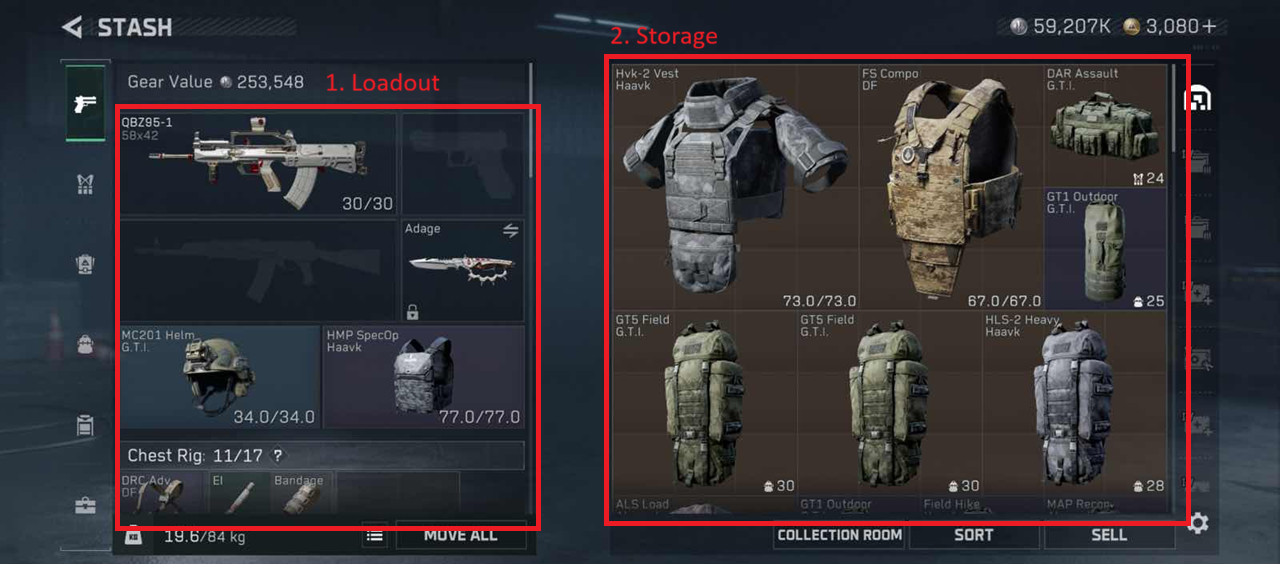
1. Loadout Area: See what you are wearing and holding!
- Helmet
- Vest
- Chest Rig
- Backpack
- Safebox
2. Storage Area: All your equipment and items here!
- There are 6 levels of Rarity for items: Grey, Green, Blue, Purple, Gold, Red.
- Gear and Ammo also follows the same colours, but go by Level 1-6.
Video on Stash (4.5mins):
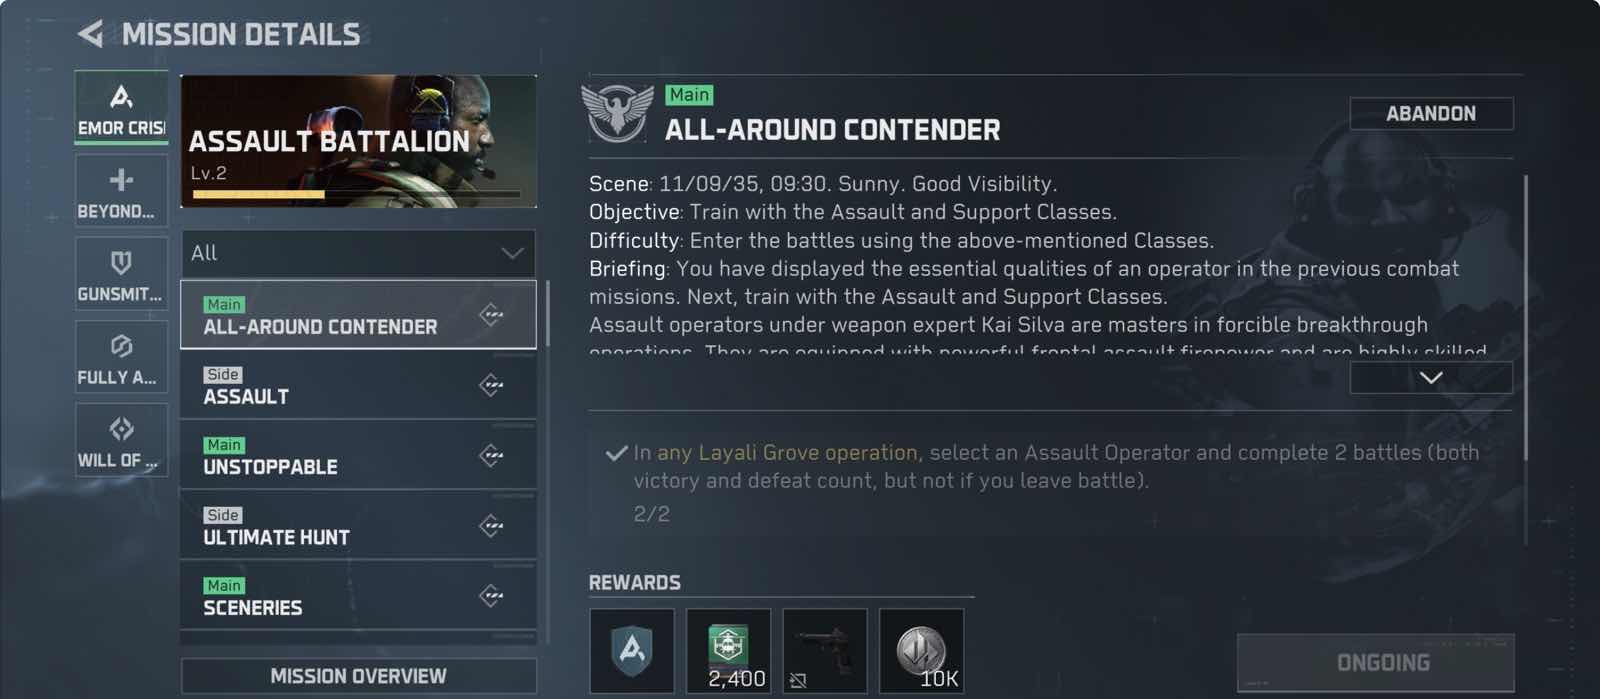
1.3. Departments
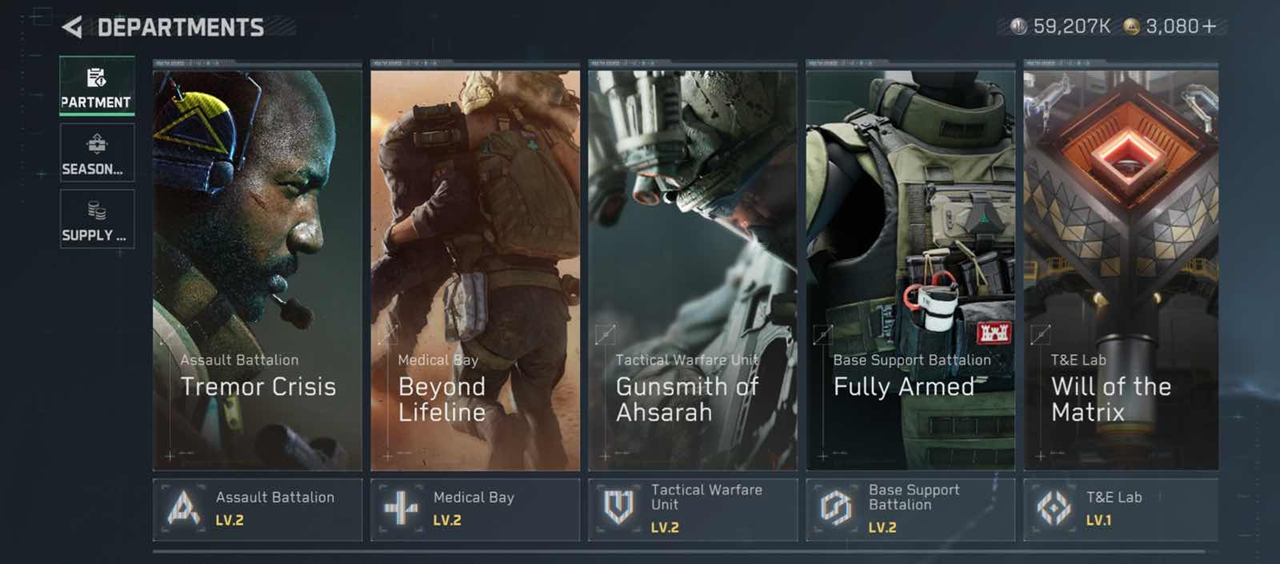
This section contains your Departments. They contain missions that you can complete to get rewards and level up your Departments.
- This will help you unlock more items in the Supply Station, and
- There are some level Department Level requirements for Black Site Upgrades (more in Section 1.5)!
Video on Departments (4.5 mins)
1.4. Departments - Supply Station
Purchase items (or exchange them) from the Supply Station for your next match.
Almost all the items that you need in battle are available here, but you can unlock other special items by leveling up your Departments.

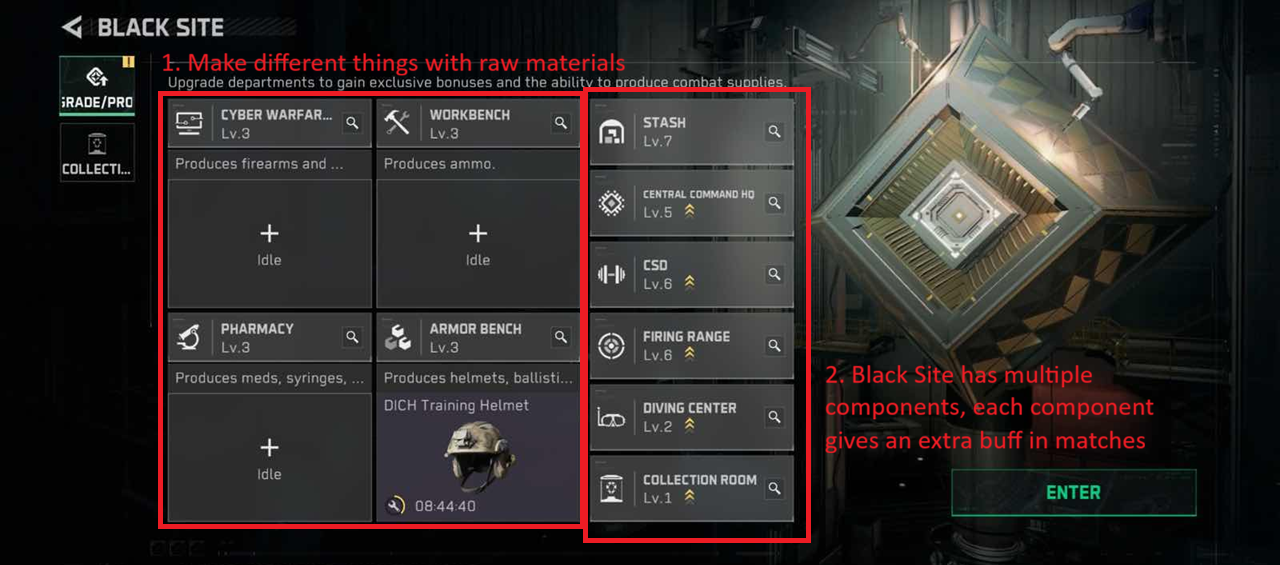
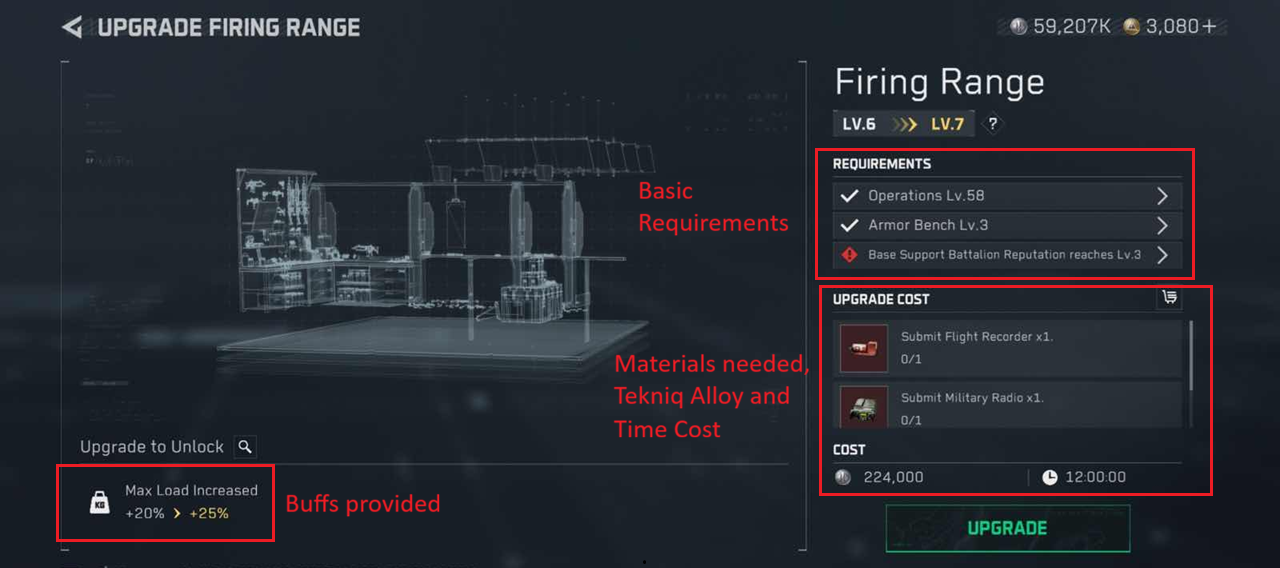
1.5. Black Site
Think of the Black Site as a factory. It can help you produce items, and give you additional buffs for your matches.
Video on Black Site (~1min):
SECTION 2: GETTING READY
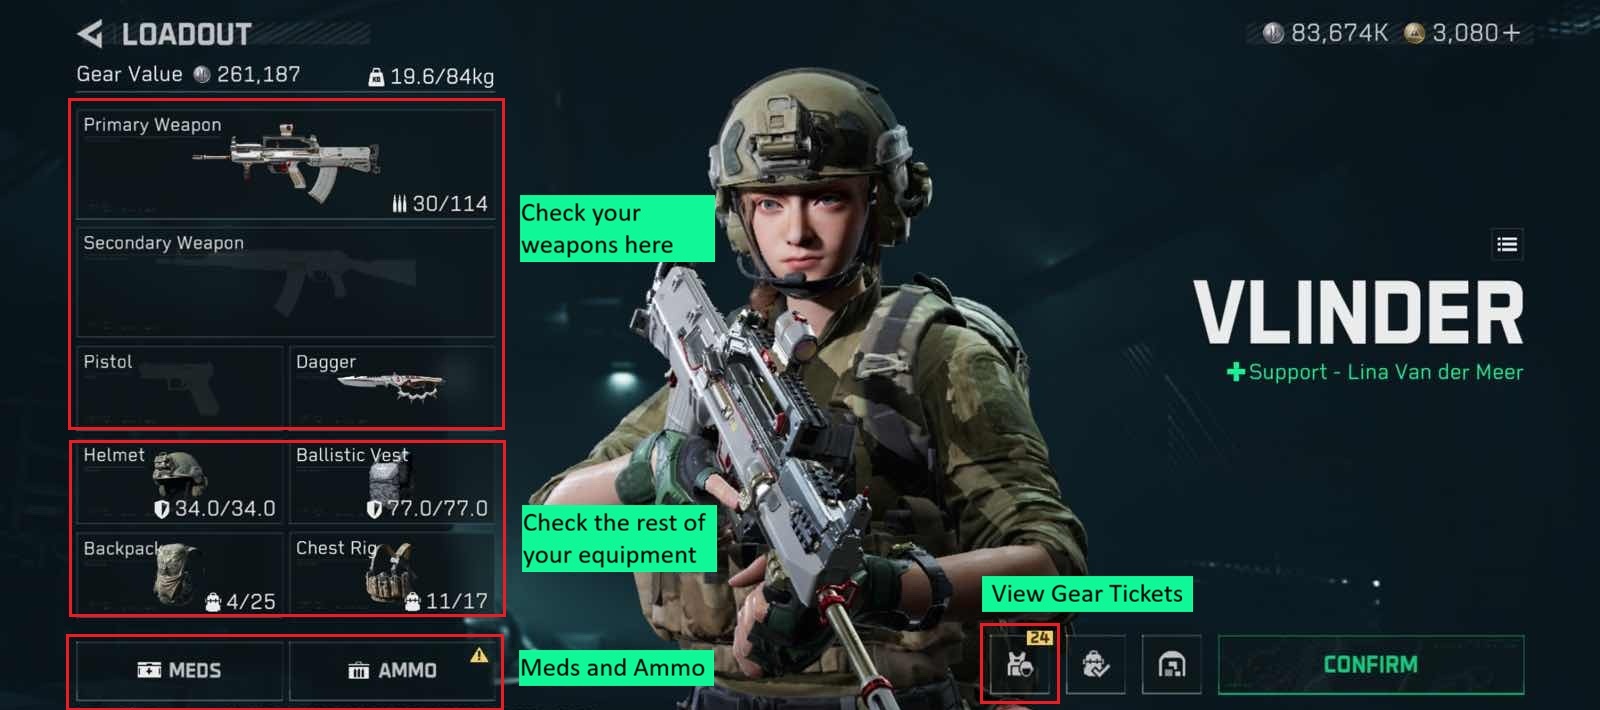
2.1. Loadout
This screen is a 1 stop overview to manage your loadout.
Loadout Video (~2mins):
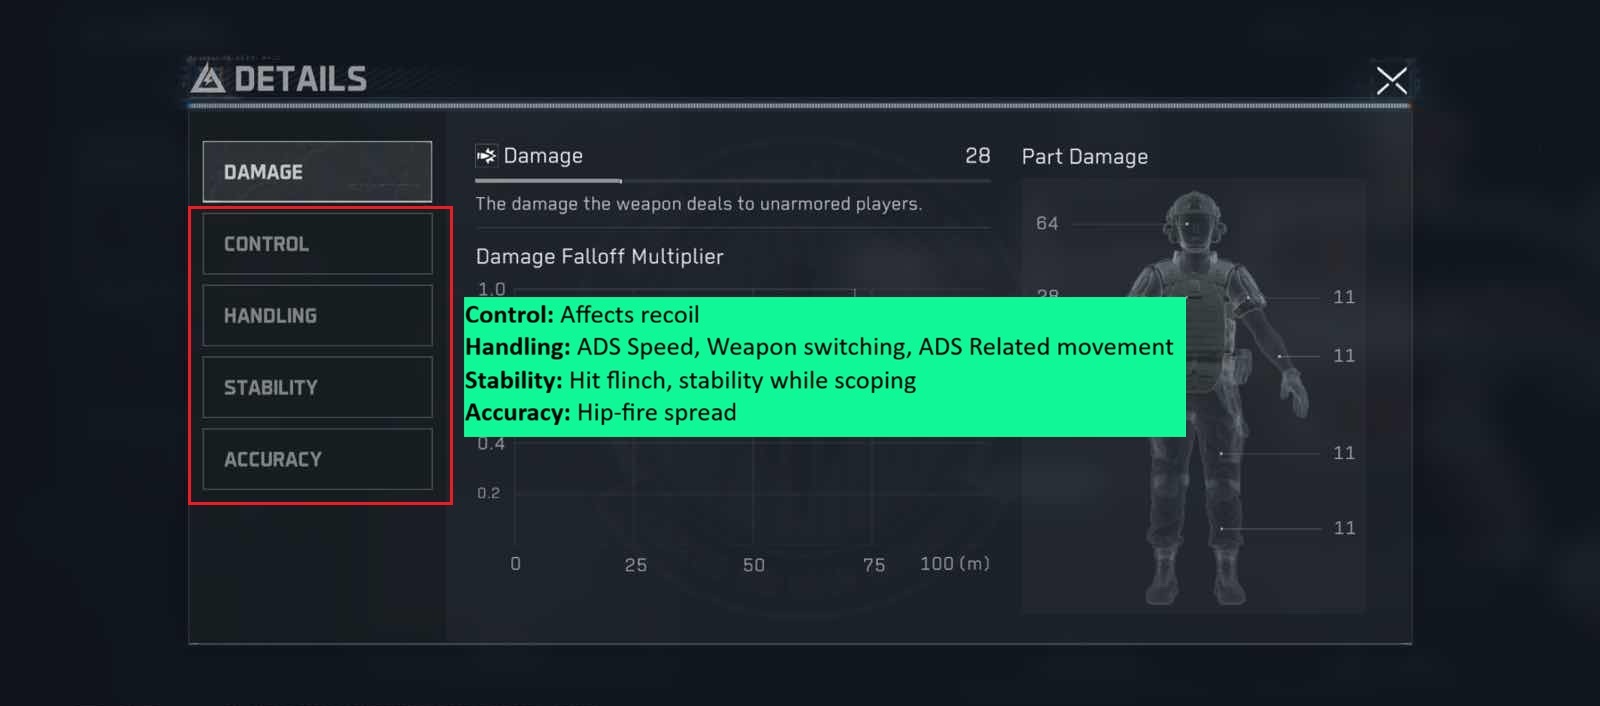
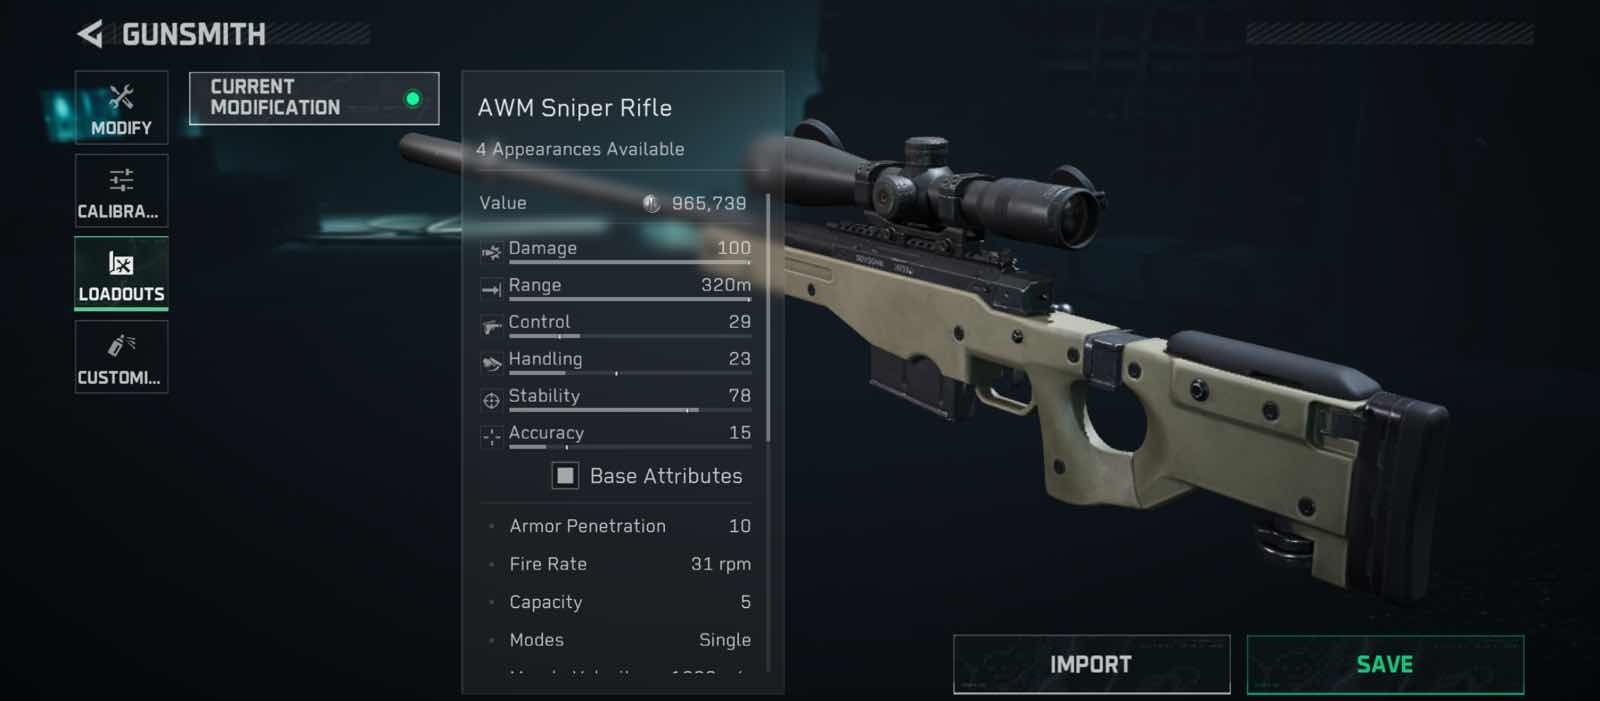
2.2. Gunsmith - Your Weapon Your Way
One of the best parts about Delta Force is that you can customise your gun to exactly your playstyle.
The image below shows how each aspect affects your weapon.
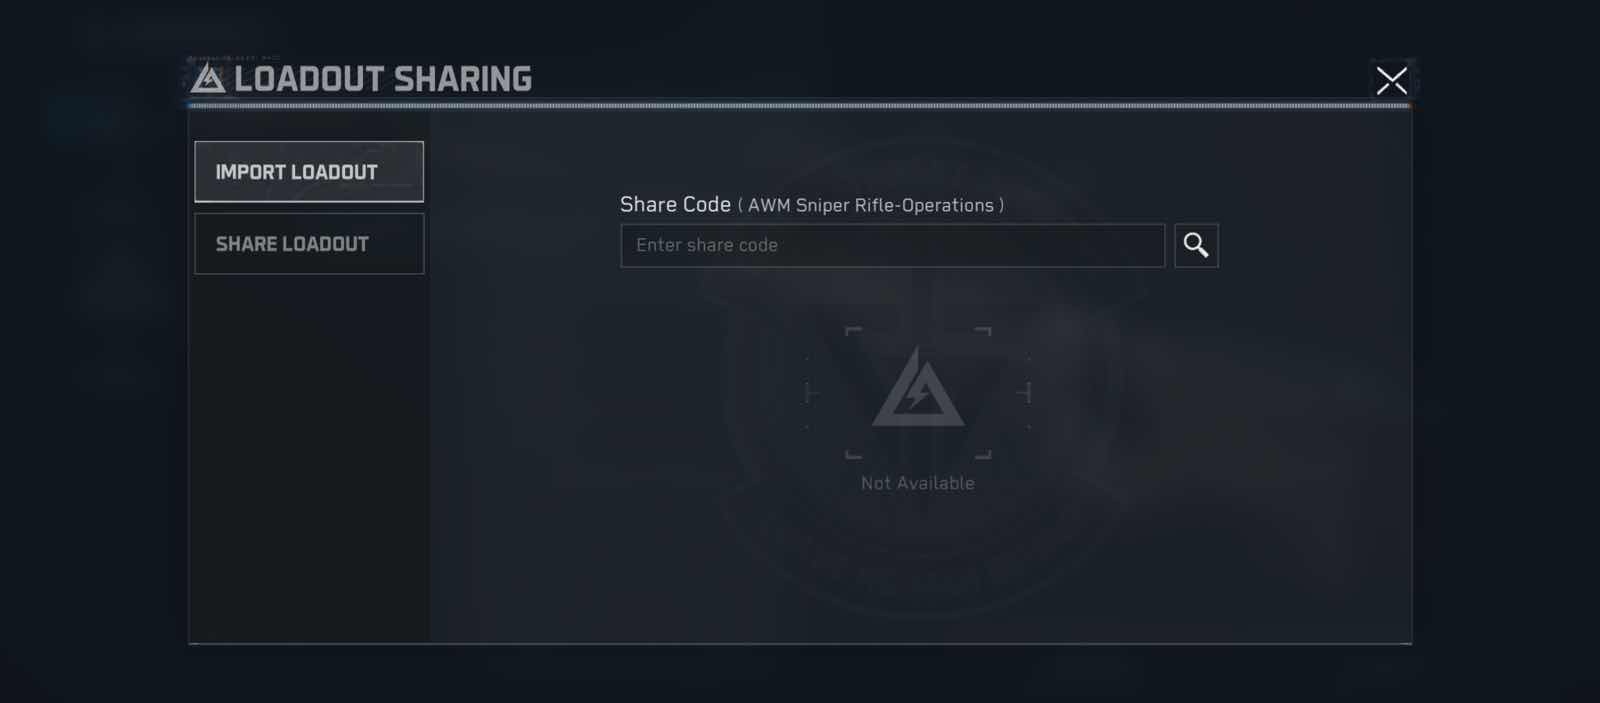
Importing Loadouts
If you want a ready-made loadout, on the page go to Loadouts > Import, and you can paste the import code in.
Take note you can only use Garena codes in the Garena version.
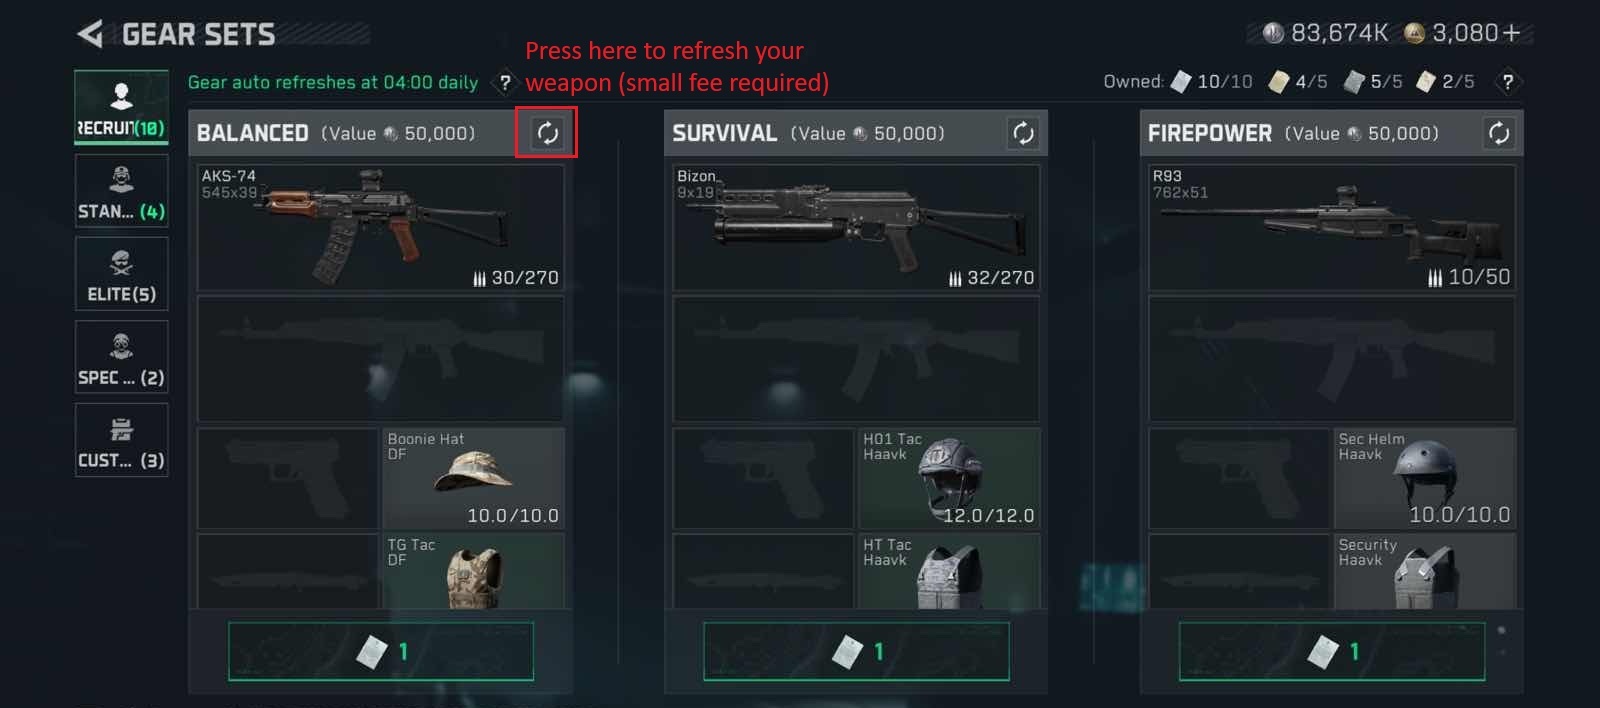
2.3. Gear Tickets - Not sure what to bring?
Gear tickets give you a free kit (Armour, Weapons, Ammo, Medicines). Use them as much as you want!
These gear tickets can be obtained from missions and events, so they are easy to get back.
Video on Gear Tickets (~3mins)
SECTION 3: COMBAT
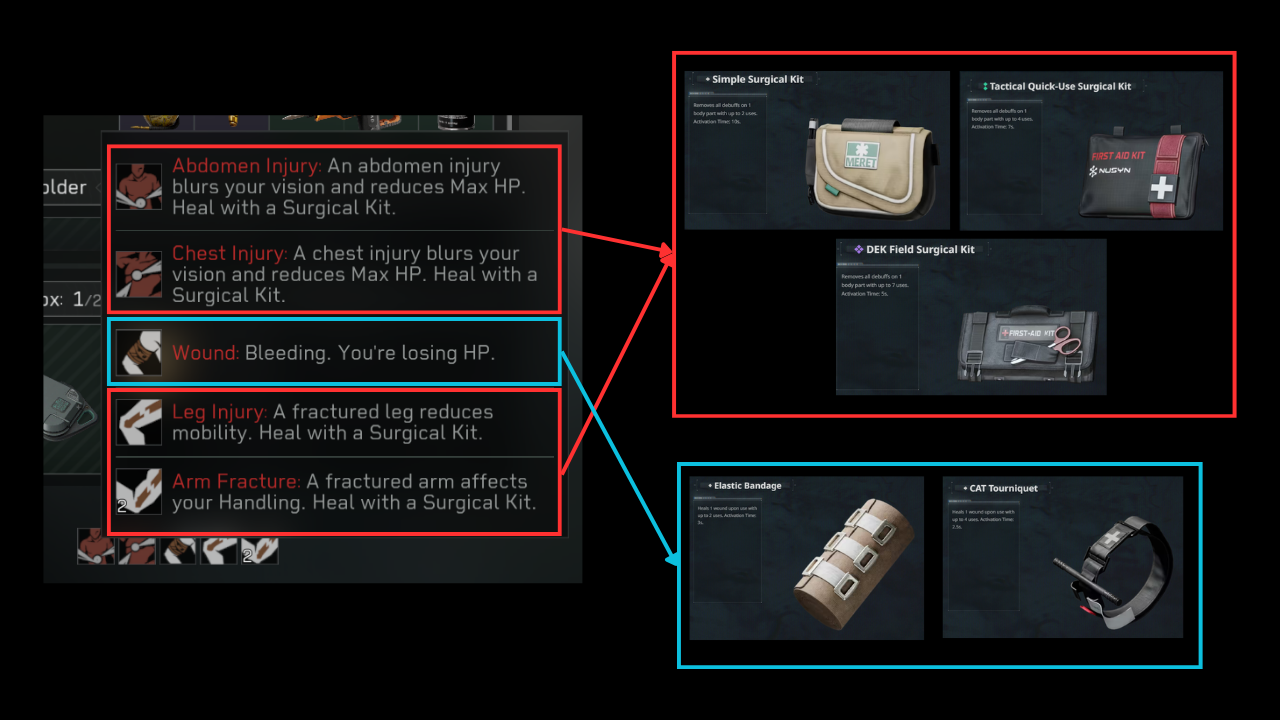
3.1. Injuries and Medical Items
Injuries are afflicted by Operator abilities (or obviously, getting shot at).
Image below shows what injury does, and which basic med item heals them.
Video on Meds (~6mins):
3.2. Ammo and Armour
Perhaps one of the most important systems to understand is the interaction between Armour and Gear. The ammo you use and the armour that your enemies wear will affect the overall time to kill.
There is a bit of math, so if you don't want to look numbers, just remember that:
High tier ammo will be able to hit health and armour harder
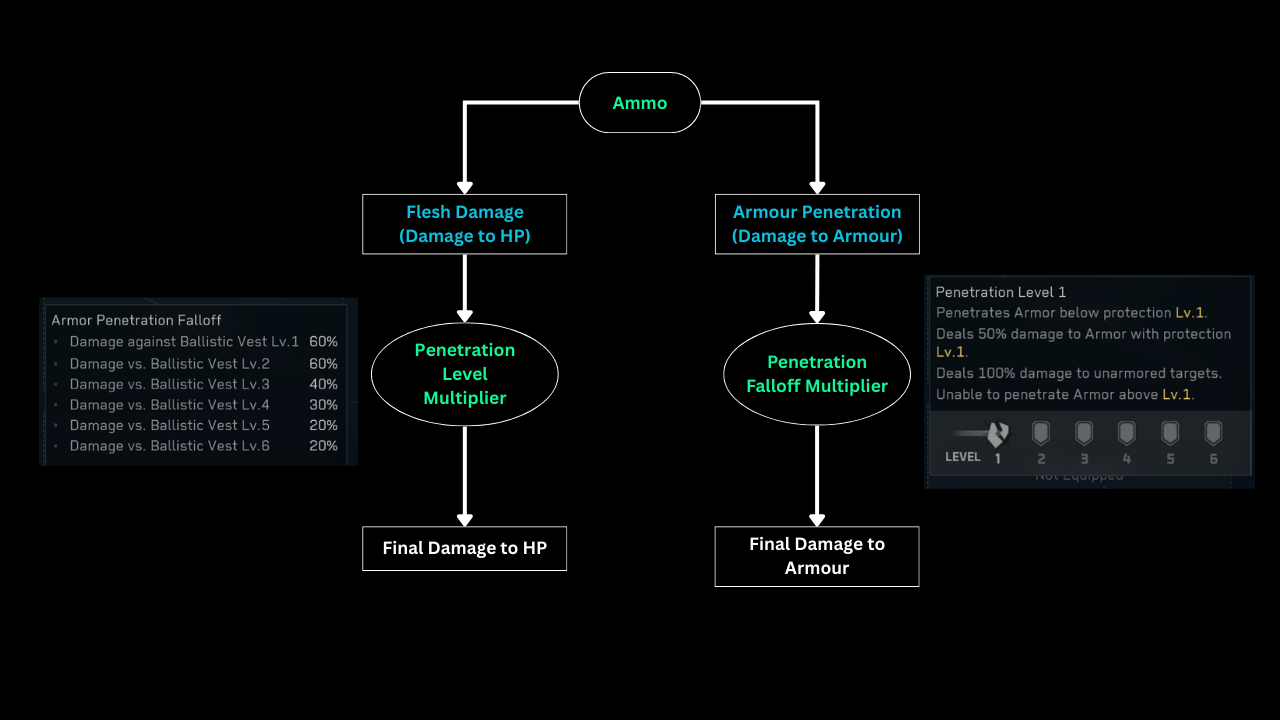
There are 2 damage types that you need to bear in mind
1. Flesh Damage = Damage to HP
2. Armour Penetration = Damage to Armour durability
First, a flow chart:
There is a combination of math here. Let's use KC-17 + Lv1 Ammo as an example.
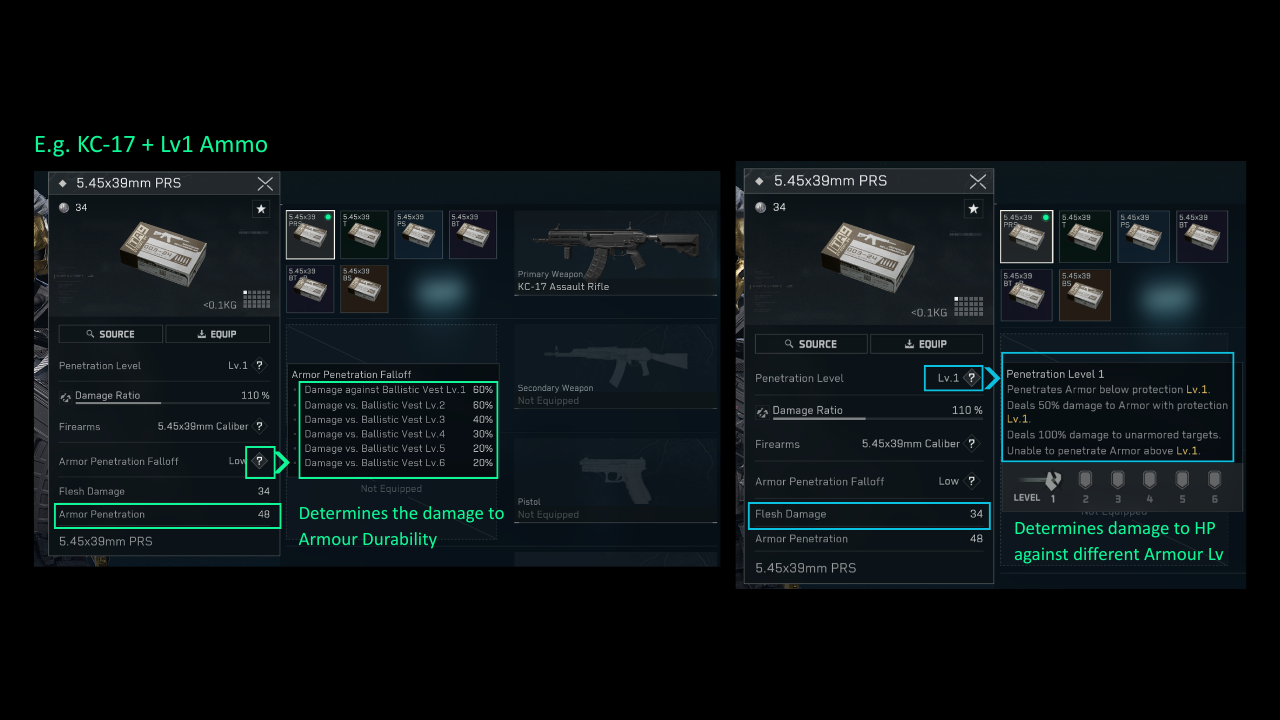
Flesh Damage = 34 (Damage to HP)
This means the base damage dealt to HP is 34. You have to offset by Penetration Level
- Against Lv1 Vest - Damage is 50%, Each round will deal 34*50% = 17 damage to HP
- Against Lv2 Vest - Will not deal damage to HP until armour is destroyed
Armour Penetration = 48
This means that the base damage dealt to Armour is 48. You have to offset this with a multiplier based on the Armour Penetration Falloff.
- Against Lv1 Vest - Damage is 60%, Each round will deal 48*60% = 28.8 Damage to ARMOUR
- Against Lv3 Vest - Damage is 40%, Each round will deal 48*40% = 19.2 Damag to ARMOUR
Here's a video:
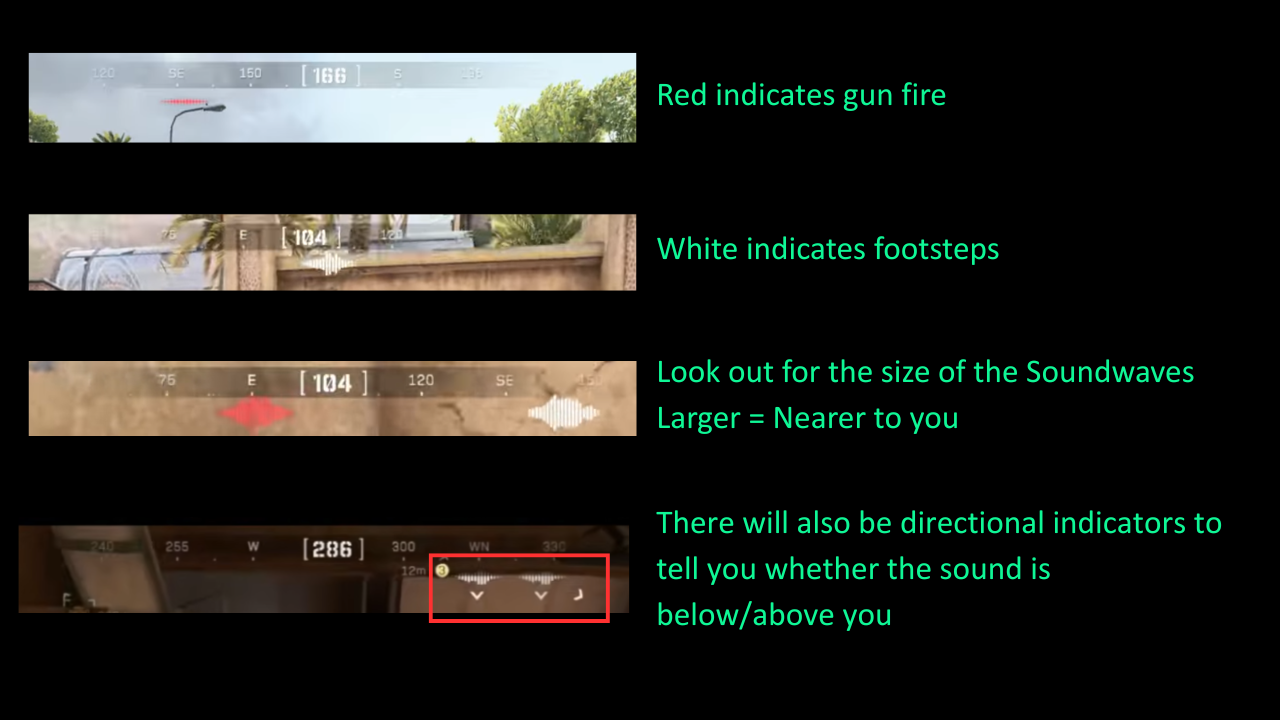
3.3. Noise Discipline
On Mobile, there are sound indicators below your compass. Pay attention to the compass and take note of sounds.
When using voice comms, it will be helpful to your teammates to report a direction. Please.
If you can hear the enemy, the enemy can hear you too.
- Red soundwaves indicate gun fire
- White soundwaves indicate footsteps
- Size of the soundwaves tell you the distance
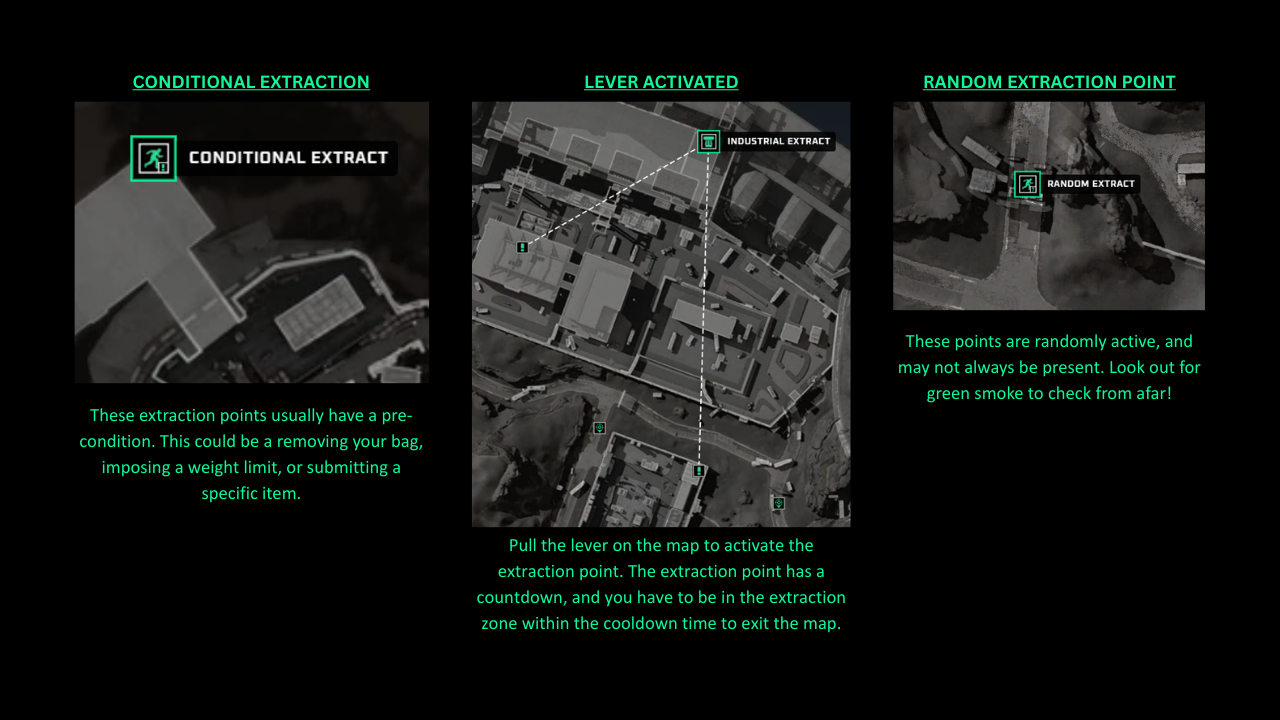
3.4. Extraction Points
These are the areas that you have to go to on the map in order to exit the match with all your items. There are a few types of extraction points:
- Fixed Points (always there in every map)
- Conditional points
- Lever Activated
- Random
- Paid Extraction Points
Paid Extraction Points:
Section 4: Zero Dam Map
A member of the community helped to compile this guide for new users.
Clicking this brings you to a Google Slide: LINK
Section 5: Tips and Tricks and Other Resources
Looting
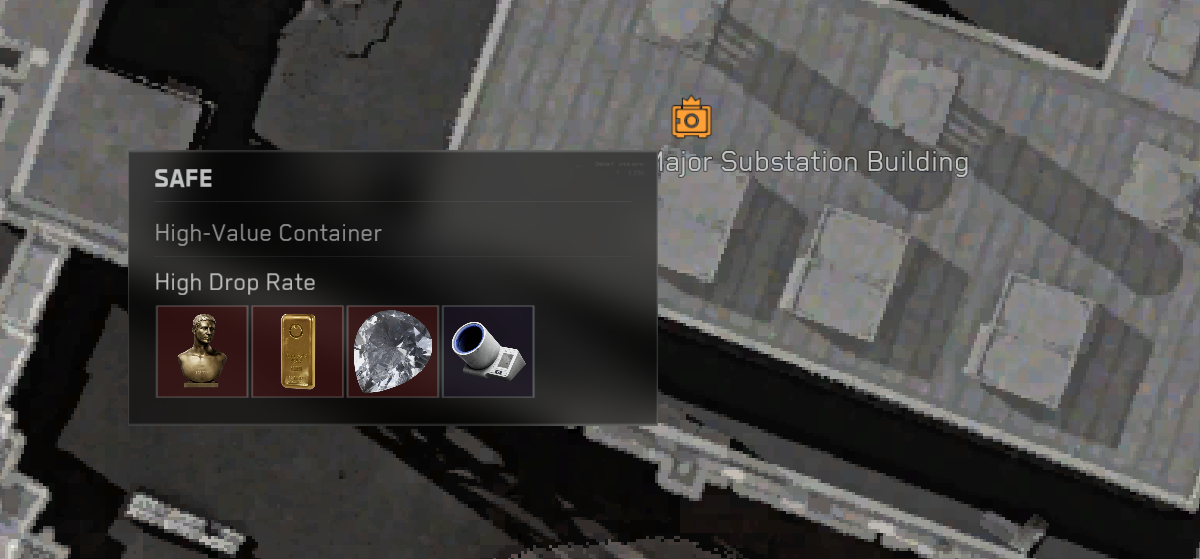
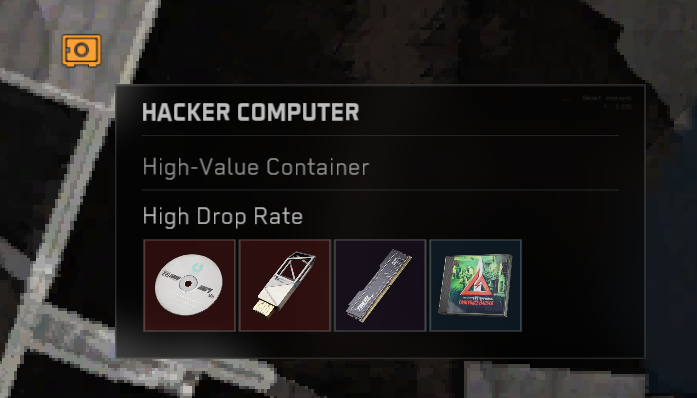
Orange icons may appear on your map. These are more likely to contain high value loot.
Head over to explore, but beware that other squads may be targeting the same treasure. You are more likely to encounter enemies too.
Not sure what items to loot? Rule of thumb:
1. Always keep RED and GOLD items
2. Pick up BLUE and PURPLE items and swap them for better loot later
3. After knocking down another operator, check if their gun is high value
4. Any other specific items you need for missions or crafting
That's all, Operator! See you in-game!